, or condensed cow's milk with added sugar, has a thick, viscous consistency and an intensely sweet flavor. Thanks to the evaporation of water, it becomes shelf-stable and does not require refrigeration before opening. Whipping cream (preferably 30% or 36% fat) adds a velvety, light, and delicately milky flavor to the dessert. When heated, the fat in the cream combines with the sugars, creating a stable emulsion that thickens upon cooling, but does not solidify like jellies or puddings.
The result? A smooth, silky cream that melts in your mouth, yet is neither cloying nor overly heavy. This is why this dessert works perfectly both on its own and as a base for more complex confectionery creations.
Ingredients – What to Buy and What to Look for
The basic recipe is based on two cans of sweetened condensed milk and two cartons of whipping cream. In Polish stores, you'll most often find condensed milk in 400g cans. Whipping cream is available in 200ml, 330ml, and even 500ml cartons – two 200ml cans are ideal for this recipe (or one 400ml can, but the proportions will be different; however, stick to the original two separate cartons).
The addition of 200g of chocolate – preferably dark chocolate with a minimum of 60% cocoa – is completely optional, but it can transform a simple, sweet cream into a complex, slightly adult dessert. The chocolate not only balances the sweetness but also adds depth and elegance. If you're making a dessert for children, you can substitute dark milk chocolate or omit it altogether – the dessert will still be delicious.
It's also worth mentioning that some manufacturers offer light condensed milk – however, we don't recommend it for this recipe. The reduced sugar and fat content affects the consistency and stability of the dessert, which may not thicken properly. The same applies to the cream – the higher the fat content, the more velvety the cream will be and less prone to curdling.
Step-by-Step Preparation – Masterclass
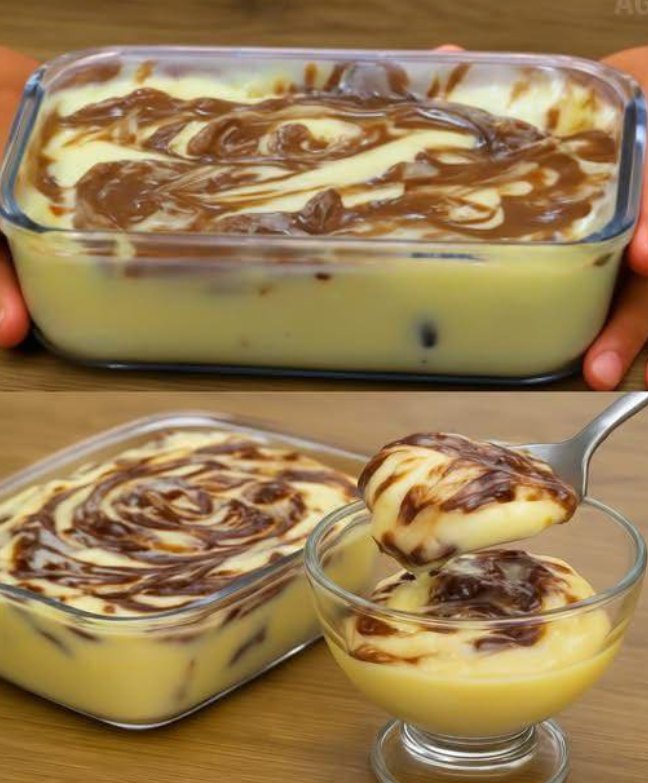
Step 1: Preparing the Base Cream
It's best to use a heavy-bottomed pot to prepare the dessert. This type of container distributes heat evenly and prevents the mixture from burning. Pour the contents of two cans of condensed milk and two cartons of heavy cream into the pot. Don't add the chocolate at this stage – it will appear later, if you decide to use it at all.
Set the pot over medium heat. From this point on, one step becomes crucial: constant stirring. You can use a wooden spoon, a silicone spatula, or a whisk – it's important to stir the mixture both at the bottom and around the edges. Why is this so important? The sugar in condensed milk tends to settle to the bottom and caramelize, resulting not only in burnt consistency but also in an unpleasant, bitter note in the finished dessert. Regular stirring will break up any lumps and ensure a uniform, smooth texture.
The mixture will initially be thin, almost watery – don't worry. After about 5–8 minutes (depending on the heat of your burner), it will begin to thicken noticeably. How do you know when it has reached the right point? The best way is the spoon test: dip a spoon into the cream, remove it, and run a line through the coating on the back of the spoon with your finger. If the trace remains clear and the mixture doesn't run off immediately, it's a sign that the cream is ready. However, be careful not to overcook it, as it will harden excessively upon cooling and lose its creamy consistency. You should achieve a thick, yet still soft and silky custard, not a set mass.
Step 2: Optional Chocolate Enhancement
If you decide to add chocolate, it's best to grate it coarsely or use ready-made chocolate drops. Small pieces will melt faster and more evenly. Remove the pot from the heat, add 200g of chocolate, and stir vigorously until completely combined.
You can also add the chocolate earlier, while the mixture is still heating – it will then melt along with the cream. However, be careful: chocolate, especially dark chocolate, can thicken the mixture slightly, so it's best to add it towards the end of cooking, monitoring the consistency constantly. You can also use the chocolate as a decorative element and not stir it thoroughly, leaving visible streaks – the visual effect will be stunning, and each serving will surprise you with a slightly different flavor combination.
The rest of this article is on the next page. Advertisement